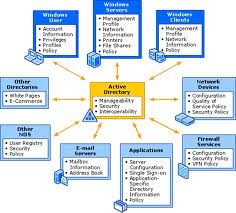
Active Directory Services
- AD Introduction & Installation
- AD Maintenance
- Managing user account groups
- Operation Master
- AD Replication
- Group Policy
Active Directory:
- It is centralized repository that stores information about objects (users, computers etc)
- Objects belong to different classes like users belong to user class and groups belong to group class etc.
- Classes are two types: Predefined Classes & User Defined Classes
- Attributes of class can be increase & decrease
- Note: Only one Active Directory schema in Active Directory
- Every domain has a copy of Active Directory Schema
- Any object published in ADS will be available in entire domain e.g. printer etc
Snap-In: Active Directory Scheme
Run: Adminpak.msi (First install complete ADMINPAK)
Run: MMC -> Active Directory Scheme (To create new class etc)
Benefits:
- one user contain one account -> universal resource access
- one group may contain multiple accounts -> universal resource access
Active Directory Structure
- Physical Structure of ADs: (replication of DB sees physical structure)
- Sites
- Subnets
- Domain Controllers
- Logical Structure of ADs (depend on company administrative model)
- Forest
- Tree
- Domain
- OU
Active Directory Partitions
Based on object nature there are 4 partitions
- Schema Partition Forest specific replication
- Configuration Partition Forest specific replication
- Domain Data partition Domain specific replication (*)
- Application Partition Configurable replication
- (e.g. DNS domain /forest level)
(*)E.g. If change in user schema it goes in all DCs within Domain
To see 4 partitions use support tools first install from CD > Supports > Tools > suptools.msi
Run: replmon (replication monitor tool to see AD partitions)
Right click on Monitored Server > select Add Monitor Server (Wizard) > Search the directory for the server to add (write name or select: srv1 etc)
Domain Types
- 1. Root Domain:
First domain of a forest &Installation of root domain create forest.
Only one time install root domain in forest
Root domain is also a parent domain when install root domain it can be parent or child also.
- 2. Parent Domain:
First domain of a tree is called parent domain &Installation of parent domain create tree.
- 3. Child Domain:
When install child domain no tree created
Forest:
- Collection of trees or domains sharing of same configuration, schema and global catalogs is called a forest
- Collection of domains having parent child relationship
- Collection of domains having contiguous namespace
- For example mcse.com
Sales.mcse.com
Marketing.mcse.com
Note: Schema Admin & Enterprise Admin groups only available at Root Domain
Installation of Domain
Prerequisites: Static IP & DNS IP (own IP) & NTFS Partition
Profile maker: software used to enhance security for window95, NT and then they also can be part of domain 2003
ADsizer: tool at Microsoft to design active directory information
Lc5 tool for administrator to get user password from active directory
Run: DCPROMO
- 1. Client information
Window 95
Window NT 4.0 SP3 or earlier
These operating systems cannot be part of domain 2003, but after these like windows 98, NT with SP4 can be part of domain 2003
- 2. Options:
- Domain Controller for a new domain (select)
Creating new domain, not here can specify domain type
- Additional domain controller for an existing domain
Just creating ADC for existing domain
- 3. Here can define domain status/types
- Domain in a new forest (everything creating new)
Root domain as well as parent domain. (Create forest & tree & domain)
- Child domain in an existing domain tree (Become part of existing domain)
Child domain only
- Domain tree in an existing forest (become part of existing forest)
Parent domain (Create tree & domain)
- Netbios Name: netbios name has no dot in it
D:windowssysvol (sysvol folder required NTFS partition)
- Ask you to install & configure DNS, so install it to work domain properly.
- 6. Permission options: (for Servers)
- Permissions compatible with per-Windows 2000 server operating systems
Support server 2000 & earlier e.g. web site is running on NT server etc
- Permissions compatible only with Windows 2000 or Windows 2003 operating systems (select)
Only support server 2000 & server 20003
- 7. Directory Restore Mode Password: (use password must)
If you stop DNS or DHCP service it goes offline but no service for directory services to do offline so only one way that is directory services restore mode.
Note: Reboot > F8 > Directory Service Restore Mode
If you don’t use restore mode password then you cannot restore the directory services because when you go F8 > directory services restore mode then all DB goes offline and you unable to login at domain, if you use this password then directory services not go offline & you can login.
Note: ADS take 7 – 8 min to install
Active Directory Maintenance
1: Backup Ads DB data base Online
2: Restore Ads DB Offline
Authoritative restore
Non-Authoritative restore (normal)
3: Move Ads Database Offline
4: Ads DB Defragmentation (automatically) Online
Note: only one task i.e. backup will be performed by administrator
1: Backup Ads DB
Run: ntbackup or Programs > accessories > system tools > backup
Select only backup the system state data
2: Restore Ads DB
Authoritative restore
Why: when more than one domain controllers then authoritative restore required, if only one domain controller then no need authoritative restore
Suppose there are two DC1, DC2 then that DC will get authority (its replica will replicate) whose version number is higher.
Two way of authoritative restore
1: Run: ntbackup > restore > system state & Ok (Authoritative restore) & Advance restore options
Checked: when restoring replicated data sets, mark the restored data as the primary data for all replicas. (Only in windows 2003)
2: Cmd: ntdsutil
Ntdsutil: Authoritative restore
Authoritative restore: restore database
Opening DIT database…….done
The current time is …time….
Most recent database update occurred at –data– &– time—
Increasing attribute version numbers by 100000
Counting records that need updating……………….
Record found: 0000005000
Done
Found 5000 records to update
Updating record…………….
Records remaining: 0000000000
Done
Successfully updated 50000 records
Authoritative restore completed successfully
Note: It automatically increase version no by one lack per day so this DC database replica will be replicated to other DCs
How to See Version ID
Run: replmon
Right click on Monitored Server > select Add Monitor Server (Wizard) > Search the directory for the server to add (write name or select: srv1 etc)
Right click on srv1 and select “Show attributes Meta-Data for Active Directory object” & Ok
Write cn=administrator,cn-users,dc=mcse,dc=com in “View Meta-Data for Object window” & Ok
Note: now do change in user properties and see affect here version id will increase by one.
Non-Authoritative restore (normal restore)
Reboot > F8 > directory service restore mode
Run: ntbackup > restore > system state & Ok (non-authoritative restore) & ok
3: Move ADS Database (change path)
Bydefault path: C:Windowsntds
ntds.dit database file (max size 10 mb)
edb.log log file (current) old one is edb00003.log
res1.log reserve log file
edb.chk check point file (changes save in it)
Cmd: ntdsutil
Ntdsutil: files
File maintenance: move db to d:ads
File maintenance: move logs to d:ads
Completed
4: Ads DB Defragmentation (automatically)
Database is in form of pages, data write in form of page 1,2,3 etc when some data is deleted like from page 2 then next data will write on page 4, so if defragmentation run then next data will be written on page 3.
ADS perform defragmentation every 12 hour automatically (recommended) called Garbage collection process, admin can also perform manually.
Cmd: ntdsutil
Ntdsutil: files
File maintenance: compact to d:ads
Opening database [current]
Creating dir: d:ads
Executing command: …………………………………………….
Initiating DEFRAGMENTATION mode…..
.
.
Operation completed successfully in 12.640 seconds
If compaction was successful you need to:
Copy “d:adsntds.dit” “c:windowsntdsntds.dit” and delete the old log files: Del c:windowsntds*.log
Note: now copy compact db file from new location to into c:windowsntds
Managing User Accounts & Groups
Groups
Group Types
Ability to assign permissions & Email system import
Security : Permission + email system
Distribution : email system only
Group Scopes
Group Scope based on Membership & Visibility
Domain Local group Membership ->Users from any domain in the forest
Visibility -> in its own domain.
Domain Global group Membership -> Users from its own domain
Visibility -> throughout the forest
Domain Universal group Membership ->
Visibility ->
Account domain (where user accounts)
Resource domain (where resource available)
AGDLP
A add users
G global groups
DL domain local groups
P permission
Global group can add to Local group but not local into global.
Now give permission or rights “Local Group-ABC” through the Resource properties at Domain B, all other users from Domain A, B, C will get these rights because Group-A, Group-B, Group-C are added into Local Group-ABC.
Bulk import process:
1: Csvde (.csv)
Only for object addition,
Comma separated file format
Step 1: Create a file and save it with .csv extension
Step 2: import the file using following command csvde –I –f test.csv
2: Ldifde (.ldf)
Addition / modification / deletion
Line delimited file format
Step 1: Create a file and save it with .ldf extension
Step 2: import the file using following command ldifde –I –f test.ldf
Windows scripting host
Import vb script (.vbs)
Step 1: Create a file and save it with .vbs extension
Step 2: import the file using following command vbscript test.vbs
Bulk import process to perform much work at a time, like users, groups, OUs but it is recommended for Users because they are created much more.
Run: replmon (to see distinguish name)
Cn=administrator,cn=users,dc=mcse,dc=com
Command Prompt:
When add user by command, its account disable by default.
Dsadd user cn=shad,dc=mcse,dc=com (add user)
Dsadd user cn=shad,cn=users,dc=mcse,dc=com (add user in Users group)
Cn -> Common / Container Name
Dsadd ou ou=sales,dc=mcse,dc=com (add OU)
Dsadd user cn=shad1,ou=sales,dc=mcse,dc=com (add user in OU) (add OU)
This is distinguish name “cn=shad1,ou=sales,dc=mcse,dc=com” & remaining is cmd parameters
Dsrm “cn=nawazish ali. shad”,cn=users,dc=mcse,dc=com (to delete account)
Sample file CSV
# CSVDE Comma Separated file format
#dn,objectclass,useraccountcontrol,l,description
#”cn=user1,dc=mcse,dc=com”,user,512,lahore,testing
dn,objectclass,samaccountname,useraccountcontrol
“cn=user11,dc=mcse,dc=com”,user,user11,512
“cn=user12,dc=mcse,dc=com”,user,user12,512
“cn=user13,dc=mcse,dc=com”,user,user13,512
“cn=user14,dc=mcse,dc=com”,user,user14,512
“cn=user15,dc=mcse,dc=com”,user,user15,512
# save as test.csv at c drive
cmd:
csvde -i -f test.csv
Bulk operation completed successfully, means users created.
cn = display name, it’s not a login name, so user can not login with cn name because ADS automatically generate login name which is difficult to remember, so now add samaccountname, through this user can login.
Active Directory Schema (to see attributes)
Run: regsvr32 schmmgmt.dll
run: mmc > Active Directory Schema
Sample file ldf
Add account
dn:cn=shad1,dc=mcse,dc=com
changetype:add
objectclass:user
samaccountname:shad1
l:lahore
useraccountcontrol:512
dn:cn=shad2,dc=mcse,dc=com
changetype:add
objectclass:user
samaccountname:shad2
l:lahore
useraccountcontrol:512
dn:cn=shad3,dc=mcse,dc=com
changetype:add
objectclass:user
samaccountname:shad3
l:lahore
useraccountcontrol:512
Save as test.ldf
Cmd: ldifde –I –f test.ldf
Delete account
dn:cn=shad1,dc=mcse,dc=com
changetype:delete
Save as test.ldf
Modify account
Single Value
dn:cn=shad1,dc=mcse,dc=com
changetype:modify
replace:l
l:Islamabad
Multiple Values
dn:cn=shad1,dc=mcse,dc=com
changetype:modify
replace:l
l:Islamabad
dn:cn=shad1,dc=mcse,dc=com
changetype:modify
replace:description
description:this is first account
Save as test.ldf
————————————————-
Operations Master/ FSMO/Role Holder
DC & ADC both have a write able copy, means we can define object at both servers.
1: Schema Master One/Forest
2: Domain Naming Master One/Forest
3: RID Master One/Domain
4: PDC Emulator One/Domain
5: Infrastructure Master One/Domain
Domain roles: Active Directory Users & Groups -> Right click on DC -> Operation master (see operation master field in RID, PDC, Infrastructure tabs)
Forest roles: Active Directory Domains & Trusts -> Right click on root not on DC -> Operation master (see domain naming operation master)
1: Run: mmc -> File -> Add/Remove Snap-in -> Add button (if no active directory schema available here means not install complete admin tool, so install admin tool write at run: adminpak.msi, install complete admin tools, now active directory schema available)
2: Run: regsvr32 schmmgmt.dll (only register Active Directory Schema)
Now right click on Active Directory Schema -> Operation master (see operation master role)
DC has all 5 roles & ADC have no roles by default because it has just a copy of DC
Two Forest Roles
1: Schema Master (One/Forest)
To update schema (database) is responsibility of schema master, means synchronization
Schema master is available at every DC & ADCs but only DC has control / right to modify the schema, why it is available at every DCs because incase of DC crash then ADC can be converted to DC.
Run: regsvr32 schmmgmt.dll (only register Active Directory Schema)
2: Domain Naming Master One/Forest
Responsible of domain addition/removal of existing domain from forest Modification of schema master and domain naming master is rare because no one modified these both roles on regularly basis
Three Domain Roles
3: RID Master One/Domain
Allocate lock of RID to other domain controller
RID manage Object uniqueness: SID (security Identifier) cannot change, it’s unique of each user. And SID use to specify permissions. Even if we change user name etc its SID never change. if we delete the user and again create a user on that name he cannot access the Sid of the deleted user, because new user generating new sid
SID= Domain ID + RID (RID portion is maintained by RID master)
Within domain RID is unique, different domain can generate same RID but no problem because domain ID will change?
To See SID: delete user account and see in computer properties -> profiles (show SID value).
4: PDC Emulator One/Domain
In Windows NT, during installation domain make (PDC, BDC, and Member server), if you make member server and want to change it into PDC etc then need to reinstall OS again.
PDC (primary domain controller) BDC (read only copy of PDC)
Install DC 200X when try to install on BDC (read only copy no change possible, change be possible on PDC server) then PDC emulator at server 200X act as PDC for window NT,
PDC 4 tasks
Act as BDC for Windows NT (backup domain controller)
Minimum password change latency (delay) (means take minimum time when change password)
Clock synchronization (in b/w DCs)(keep all dc time same)
It avoid group policy conflicts (when we modified the group policy and we have multi dc the it preferred to pdc)
AD User & Groups -> DC name -> Properties > Group Policy -> Edit (Group policy edit window)
Right click on Default Domain Policy [mcse.com] -> View -> Detail -> DC Options; now see this option is checked “The one with the Operation Master taken for the PDC emulator” means in multiple domain controllers it prefer PDC emulator so result is “It avoid group policy conflict”
5: Infrastructure Master One/Domain
Responsible to stores user to groups references
Transfer / Seize DC Roles
DC1 (DC) Predecessor (already role holer) & DC2 (ADC) successor(whose become role holder)
If DC unavailable then active directory structure will be disturbed means if operation master is not available like if schema master not available then how schema will modify, if RID not available, how make new users, if domain naming master not available then how add new domain etc
Transfer of Role (original role holder online, planed transfer)
No loss of data (because DC1 alive)
Seize of Role (original role holder offline)
Possibility of data loss
Note:
Always transfer or seize roles at successor (on pc which you want to assign roles)
Transfer of Role (original role holder online)
Way 1:
DC1 -> AD Users & Computers -> connect to Domain controller (DC2) -> Right Click one domain name an select Operation Master (RID, PDC, Infrastructure)
AD Domain & Trust -> Right click on root -> Operation Master (Domain Naming Master)
MMC -> Active Directory Schema -> Operation master (Operation Master)
Way 2:
Run: cmd
C:>dndsutil
Ntdsutil: roles
Fsmo maintenance:? to see all existing commands (5 cmd for transfer & 5 cmd for sieze)
Fsmo maintenance: connections
Server connections: connect to server dc2
Server connections: quit (there is no command for seize and transfer if assign ? Connect to serve)
server connections ?
Fsmo maintenance: transfer schema master & ok
Fsmo maintenance: transfer domain naming master & ok
Fsmo maintenance: transfer rid master & ok
Fsmo maintenance: transfer pdc & ok
Fsmo maintenance: transfer infrastructure master & ok
To check Roles transfer
Run: Replmon (supporttool.msi support tool must be installing to get it)
Right click Default-First-Site-Name -> Add monitored Server -> Add server explicitly by name -> type dc2.mcse.com or
Right click Default-First-Site-Name -> Add monitored Server -> Search the directory for the server to add -> type mcse.com -> select DC2 from Default-First-Site-Name
Right click – > dc2.mcse.com -> Properties -> FSMO roles tab (see all 5 roles transfer to dc2)
Seize of Role (original role holder offline)
Active directory users & computers -> operation master -> see (RID, PDC, Infrastructure) if you see “error” in operation master field, means dc is offline, now make sure dc crash, now use seize
Run: cmd
C:>dndsutil
Ntdsutil: roles
Fsmo maintenance:? to see all existing commands (5 cmd for transfer & 5 cmd for sieze)
Fsmo maintenance: connections
Server connections: connect to server dc2
Server connections: quit
Fsmo maintenance: seize schema master & ok
Fsmo maintenance: seize domain naming master & ok
Fsmo maintenance: seize rid master & ok
Fsmo maintenance: seize pdc & ok
Fsmo maintenance: seize infrastructure master & ok
Active Directory Replication
Physical structure of AD is studied for AD replication
Replication Topology:
Two type of changes occur at every domain, one is forest level & second is domain level
Scheme & configuration [forest-auto],
Domain data [domain-auto],
Application [manual-configurable])
Site: collection of domain controllers connected with a high-speed, permanent and reliable connection
Replication Types:
Intra-site replication (replication within a site)
1: Uncompressed traffic (because of LAN high BW)
2: Event triggered replication (as change occur replication done)
3: Automatic
4: No configuration needed
Inter-site replication: (replication between sites)
1: Compressed traffic (because of Low WAN BW)
2: Schedule
3: Manual
4: Configuration needed
Active Directory Site and Services (dssite.msc)
Inter-Site Transportation
Protocols: (these protocols used for inter-site replication)
IP (choose IP if band width good)
SMTP (limited band width, dialup, isdn etc)
For inter-site replication; there are 5 things in inter-site links (Inter Site link represent link between two sites)
1: Protocols
2: Member sites
3: Cost value (tell link reliability(when multiple link), mater low cost link, if only one link then no cost count)
4: Interval (how replication occur; by default 3 hour, manual 15 min)
5: Schedule
Active Directory Site and Services -> Sites -> Default-First-Site-Name -> can see one default site
DNS used to read physical structure of active directory, in DNS you can see detail of each site
Rename Default First Site as Lahore (good practice) (ip and smtp protocol are responsible for replication in the active directory sites and services)
Add new site (right click on site -> new site -> type name Karachi
Add new site (right click on site -> new site -> type name Islamabad
Link b/w Two Sites
Link consists of five things
(1)Protocols (2) Member Sites
SMTP -> right click -> new site link -> type name Lahore to Karachi Link
(If only two site exist then automatically add here, if more than two then need to select)
(3) Cost (cost check the reliability Cost used while some links) (4) Interval (interval define how much time replication take place by default 3hours and minimum 15 minuts)(5) Schedule
Properties of “Lahore to Karachi Link”
Cost: Default 100 b/c LAN link & consider when more than one link
Replicate Every: Default 180 minute (3hour), change 15-10080(1weak) minutes
Schedule: Can set schedule as per requirements
Three Sites (Lahore, Karachi, Islamabad) 4 partition 1schema and 2configuration =(while edit it edition save in forest)3domain data(edition save in domain) 4 application configuration
Lahore to Karachi link
Lahore to Islamabad link
Lahore site is being used as hub site
Now where changes will done, you have to understand 4 partition of ADS
(Scheme & configuration [forest-auto], domain data [domain-auto], application configuration [manual])
Lahore to Karachi link
SMTP -> right click -> new site link -> type name Lahore to Karachi Link
(Select Lahore & Karachi)
Lahore to Islamabad link
SMTP -> right click -> new site link -> type name Lahore to Islamabad Link
(Select Lahore & Islamabad)
Properties of SMTP checked “Bridge all site links”, means all site work as a bridge
Example:
Now add new site (right click on site -> new site -> type name Gujrat
SMTP -> right click -> new site link -> type name Lahore to Gujrat Link
(Select Lahore & Gujrat)
Now all sites are replicated to each other because Properties of SMTP checked “Bridge all site links”, means all site work as a bridge
We want Gujrat changes will not go at Karachi site, so uncheck the “Bridge all site links”, now no changes from Gujrat will go at Karachi as well as Islamabad, so we have to define manually Link Bridge (Link bridge used to combine the links)
Right Click in blank space of SMTP pane -> New Site Link Bridge -> type name Gujrat-Lahore-Islamabad -> add Lahore to Gujrat link & Lahore to Islamabad link
Note: when ever global bridging is unchecked then need to define manual bridging as per requirements, but recommended is Globall Bridge must on
Subnets
Active Directory Sites and Services
Sites
Lahore
Karachi
Islamabad
Gujrat
Subnets
192.168.16.0/24 (properties -> location -> building1/floor1 etc)
192.168.17.0/24
Right click -> new subnet -> 192.168.16.0 255.255.255.0 -> Select “Lahore” site (means this subnet used for Lahore site)
Right click -> new subnet -> 192.168.17.0 255.255.255.0 -> Select “Islamabad” site (means this subnet used for Islamabad site)
Publish locations in ADS which is defined in properties of subnet, need group policy edit
Note: Edit default domain policy -> computer configuration -> administrative templates -> printers “Pre-populate printer search location text”
When you add new printer and it ask for location (if policy on then defined locations will be available through browse button) & if not enable this policy then no browse button but you can define location manually.
Now you can search printer in active directory, it automatically show you the printer location in which subnet you pc IP address live & you can browse other printer as well.
If you want to see printers on DC then right click on domain name mcse.com -> views -> users, groups, and computers as containers
Now click on domain controllers -> dc1 (double click show you printer etc by default it show properties dialog box)
Printer printers -> unchecked “List in Active Directory” to disappear printer from ADS
No need ADS for IPP
IPP (internet printing protocol) by Microsoft to use printer over web browser
Add/Remove program -> windows components -> IIS -> Internet Printing (all printer over http)
Http://pc1/priters (to see & manage printer here)
Bridgehead Server
Suppose two DCs at Lahore and more at Karachi & Islamabad. Now change has done one by one from Lahore both DCs to other at Karachi & Islamabad. You can define one dc as bridgehead server
A domain controller that receives changes from remote site and then replicates those changes to local domain controller. Active directory select who will be the bridgehead server (randomly, no criteria) & administrator can also make manually call Preferred Bridgehead Server. But if bridgehead goes down then active directory will not take any action
If active directory make bridgehead and it goes down then it automatically make other server as a bridgehead server
Active Directory Site and Services -> sites -> Lahore -> servers (properties of DC1, see description: this server is a preferred bridgehead server for following
Add protocol: IP & SMTP & ok (now for these two protocols this is a bridgehead server)
To see bridgehead
Run: cmd -> repadmin /bridgeheads (Admin tool need)
Run: replmon -> add monitored server -> mcse.com (select Lahore-> dc1)
Right click on DC1 (Lahore) -> show bridgehead servers -> in this Server’s Site or in the Enterprise
Replication Topology:
Two type of changes occur at every domain, one is forest level & second is domain level
Scheme & configuration [forest-auto],
For & configuration made topology automatically
Both topology are same if singe domain, if different domain then both topologies will differ
See replication topologies
Run: replmon -> add monitored server -> mcse.com (select Lahore-> dc1)
Right click on DC1 (Lahore) -> show replication topologies
Click View -> connections objects only (display object) Right click on object -> Show Intra-Site Connections or Show Inter-Site Connections
Domain data [domain-auto],
Application [manual-configurable]
E.G: DNS application; it can be replicate at domain level or forest level
DNS Properties -> Replication all DNS servers in Active Directory domain [Change button] ->
To all DNS servers in active directory forest mcse.com (select this to replicate in forest)
To all DNS servers in active directory domain mcse.com (default)
To all domain controllers in active directory domain mcse.com
KCC (Knowledge Consistency Check)
Back ground service (not available in services), KCC responsibility to make/update topologies, it make bidirectional link between DCs.
Cmd: repadmin /kcc (consisitency check on local host successful)
Run: replmon -> add monitored server -> mcse.com (select Lahore-> dc1)
Right click on DC1 (Lahore) -> Check Replication topologies
Check if new dc add/remove in domain, and update topology
Group Policy Object (GPO)
GPO (consist of two things)
1: GPC – Group policy container
Provide version information for synchronization
See: active directory user & computer (enable advance feature to view GPC)
Domain name mcse.com -> Right click -> view -> Advanced Features
Mcse.com -> systems -> Policies (see two default GPC in right pane)
2: GPT – Group Policy Template
Provide group policy settings
Store: sysvol
c:windowssysvolsysvolmcse.compolicies (see default two group policies objects are available)
When install domain these two objects are created; Default Domain Policy & Default Domain Controller Policy
There are two types of settings for Group Policy Object
Restrictions & Facilities
Group policy apply at user when he login, so if many filter apply then login time proceed
GPMC – Group Policy Management Console
After 2003 Microsoft launches this tool for active directory management, when install this tool then you cannot changes in GPO through domain properties.
Download it from Microsoft site.
Start -> programs -> Administration Tools -> Group policy management tool
Job at GPMC
Backup
Restore
Copy
Paste
Export
Import
Group Policy Management
Forest: mcse.com
(Make new OU & GPO and link GPO to OU)
Domains -> Mcse.com (make new OU “Sale“)
Group Policy Objects -> New -> New group policy object name: sale
Right click on Sale GPO -> edit (if you want to edit policy)
Right click on OU “Sale” -> Link an Existing GPO… -> select Sale OU & Ok
Backup/Restore
Right click on Sale GPO -> Backup or Restore from backup
Right click on GPO -> Manage Backups (select sale GPO) if sale is deleted then you can restore
To see default security templates: cmd: cd windowssecuritytemplates> edit hisecdc.inf (view)
Mmc -> add/remove snap-in -> Security Templates (you can modify these templates & save as with new name but not make new templates from this)
Security Level: (4 levels)
Basic lease security
Compatible
High
Secure
Copy/Paste
When create new OU & have no policy object then copy/paste from existing one.
Group Policy Management
Forest: mcse.com
Domains -> Mcse.com (make new OU “Purchase“)
Right click on Sale GPO -> copy
Right click on Group Policy Object -> paste (display two options)
Default permission (when creating new GPO)
Preserve existing permission (select)
Rename the new created GPO -> type name: Purchase
Now right click on Purchase GPO -> edit (as per requirement)
Right click on Purchase OU -> Link an existing GPO -> select Purchase GPO & Ok
Import/Export
In this case both GPO sale & purchase exist, after some time policy will be same for both then do import/export
Right click on Sale GPO -> backup (this is called export of sale GPO)
Right click on Purchase GPO -> Import settings (Wizard give you choice to backup purchase GPO), now select Sale GPO & next & ok (now purchase policy will over write)
WMI Filter (Windows Management Instrumentation)
WMI filter is used to evaluate the target machine before GPO is going to apply e.g. MS Office application installation through GPO, now before policy apply first check the target machine has free space in C drive or not otherwise policy will roll back.
Note: WMI MKT software downloads from Microsoft or SQL understanding
Group Policy Management
Forest: mcse.com
Domains -> Mcse.com -> Group Policy Object -> WMI Filter -> New
Name: Office-Filter
Description: Check target machine C drive 200 Mb free for office
Add button: to add SQL Query
Select * from win32logicaldisk where drivename=‘c’ and drivetype=2 and freespace>=2000000
Note:
Win32logicaldisk table where partitions information
Drive type 2 means hard disk
Freespace=2000000 (200 MB in bytes)
Click on GPO Sale and attached the WMI filter with it.
Software Deployment Using Group Policy Object
Microsoft makes Installer File System (IFS) called MSI file that can be deployed by GPO and other as under
.MSI Installer Package File (Available)
Mostly available in CDs e.g. ms office 2003 installation pro11.msi etc
.MST Transform File / Used for customization (admin make it)
You have to make this file it’s not available, e.g. you want to install only ms word & excel then make .MST file or install with SP2 etc
.MSP Patch File / used for Service Patch & Hot Fix File (Available)
.MSI, .MST, .MSP files are by nature for Software Installation, .MSI has self repair option (means user delete some office file and now it’s not running when next time he login this file automatically copy) but .zap not has repair option.
.ZAP non MSI software (non Microsoft file) (admin make it)
ZAP file only used with user configuration policy
.AAS Script File (not used directly, only used in GPO)
If MSI file is not available then two ways you can install software; one is you can make ZAP file for installation, second MSI Maker “WinInstall” software to make MSI file
In Office CD, ORK folder (Office Resource Kit) Install on your pc to get Customization wizard to make MST file
Deployment Type (two types)
Publish (if publish then software will appear in add/remove program)
Assign (if assign then software will appear in start menu)
Group Policy Management
Forest: mcse.com
Domains -> Mcse.com -> Group Policy Object -> Default Domain Policy -> Edit
Computer configuration: (apply policy when computer restart)
Only assign software
MSI support & ZAP not
Software installation -> New -> Package -> You can select only MSI file
User configuration: (apply policy when user login)
Publish & assign
MSI & ZAP support
Software installation -> New -> Package -> You can select MSI & ZAP file
Before software deployment
1: SDP design (software distribution point)
D:SDP (make SDP folder and share permission to everyone full & security permission to everyone read/write/execute)
2: Group Policy Object -> Default Domain Policy -> Edit -> Computer Configuration -> Software Installation -> New -> Package -> pcnamesdppro11.msi (add package/application)
Show options Publish, Assigned, and Advanced
Advanced option used during specifying MSI file, to specify MST file, go to Modification tab -> add (specify MST file). After deploy this software you cannot add MST files because no button enables in Modification tab.
Properties of Software -> select “Install this application at login” if this option is not enabling then click on “Assign” radio button then it will enable, this is bug. (Now at next login application will install)
Group policy object editor -> User/Computer Configuration -> software installation -> software installation (container); anything apply on this container will be apply all the things/packages/applications which it has.
General Tab:
Properties of software installation -> type Default Package Location pcnamesdp
When adding new packages to user settings: display the deploy software dialog box (selected)
You can change any one like Publish, Assign, and Advanced: if you select Assign any new software you add will be assign automatically without displaying dialog box to user for selection etc.
Installation user interface options: Basic or Maximum
Advance Tab:
1: Uninstall applications when they fall out of the scope of management: means when GPO no longer apply then remove its all applications
2: Include OLE information when deploying applications: (Object Linking & Embedding) means if you have a document which has multi application support then enable it. E.g. ms world document which has excel chat or graph etc
3: Make 32-bit x86 windows installer applications available to win64 machines: if you have machine 64 bit and you want to run application 32 bit on it then enable this option. MSI file
4: Make 32-bit x86 down-level (ZAP) application available to win64 machine: for ZAP file
File Extension Tab:
Suppose client run a file which has no application install to open this file or there are two applications available in GPO to install at client. In this case precedence will be given to specific application which you specify here & that will be installed at client.
Categories Tab:
Used when too many applications are available; this option affect can be seen in Add/Remove Program Categories list box
Add -> Sale, Purchase, HR etc
Now under this container go to properties of available application (acrobat reader or ms office etc) -> Categories tab (to see sale, purchase, hr etc) & Add like Sale, Purchase etc; means this application for sale & purchase dept
Properties of Package/Application -> Upgrade (old version 4 to upgrade 5 etc)
When add new version then check this option: Required upgrade for existing packages means mandatory upgrade, if uncheck this then optional upgrade
Mandatory upgrade: user is bound to use the new version of application
Optional upgrade: user has right to user old one or new one
Creating MST file
ORK- First installs complete office resource kit, not typical
Programs -> MS Office -> Office Resource Kit tool -> Custom Installation Wizard -> Next -> Browse MSI file -> select Create a New MST file -> type name: Office-MST & same path where MSI file exist -> Next -> now modify which application you want to install like Ms word, Ms excel, Ms outlook and other select Not available.
Group Policy Object -> Default Domain Policy -> Edit -> Computer Configuration -> Software Installation -> New -> Package -> pcnamesdppro11.msi (add package/application)
Select Advanced option -> Modification tab -> add (specify MST file).
Deployment Tab -> Click on Assigned -> select Install this application at login
Restart computer, now it show you installing managed software’s ms office 2003
CD -> Office2003 -> Files -> OWC11 -> setup.ini (here you can add CD Key in front of product code)
Creating ZAP File
Node book:
[Application]Friendlyname=”acrobat”
Setupcommand=acrobat.exe
Version=5.0 (optional)
Save as acrobat.zap in SDP folder
User configuration -> software Installation -> new -> package -> adds (acrobat.zap), it only publish, not assign not apply at computer.
Trouble shooting ADS
Address resolution utilities included in TCP/IP
ARP (Address Resolution Protocol) to check IP to MAC address conversion
Nbtstat to check NetBIOS name to IP address resolution
NsLookup To check DNS name to IP address resolution
ARP Command
C :> Arp –a display IP to MAC address entries, these entries learn dynamically, default 2 min remain in cache, if access within 2 min again, then it increase its cache time up to 10 min in cache
C :> Arp –s 192.168.0.1 00-0a-00-0a-0a-aa
Manually add entry in ARP table, it remains in table until computer reboot or you delete manually
C :> Arp –d 192.168.0.1 Delete entry manually
Nbtstat Command
C :> nbtstat –n display net bios cache entries
C :> nbtstat –RR (Release Refresh) NetBios names registered by this computer
C :> nbtstat –r Display how many names registered by broadcast and name server
C :> nbtstat –a IP-Remote-Pc to see remote pc MAC
Nslookup Command
Ns lookup command has tow modes:
Interactive mode (when need detail information)
Non-interactive mode (when need single line information)
Interactive mode
C :> nslookup
Default server: dc1.mcse.com
Address: 192.168.0.1
> Set
> mcse.com
Non-interactive mode
C :> nslookup dc1.mcse.com
C :> nslookup –querytype=soa mcse.com
C :> nslookup –querytype=mx mcse.com
Other Command line utilities with TCP/IP
Hostname display your client name
C: > hostname (display computer name)
Ipconfig display IP configuration of your client
C: > ipconfig /all display IP configuration
C: > ipconfig/release or renew
C: > ipconfig/flushdns flush DNS resolver cache
C: > ipconfig/registerdns register DNS resource records
Netstat display network activity (Open connections) on your client
C: > netstat –r IPv4 routing table
C: > netstat –s TCP/UDP packet per protocols
C: > netstat –s | more TCP/UDP packets information per page
Ping Error Messages (Results)
TTL expired in transit no TTL at layer2 MAC add used, used at layer 3 IP address used, when loop in network then this message show
Tracert command in windows and trace route at Cisco router
Destination host unreachable ping ip-other-subnet
Request timed out ping ip-own-subnet-not-assign-any-lan-card
Unknown host ping pcname (when ping to name & not resolve by DNS)
Pathping command (2003)
Pathping 192.168.0.10 like tracert & computing statistic & tell drop packets
Pathping –n mail.mcse.com
Note: for every hop in a way, 25 second added & tell statistic after every 25 sec
Network Connection Repair Option (2003)
When you click on repair option in LAN card properties then following actions perform.
Broadcast DHCP lease/renew
Flush ARP cache
Flush NetBIOS name cache
Re-register client’s name with WINS server
Flush DNS cache
Register DNS name
Network Diagnostics
For network diagnostic need support tools, so first install them “CD:supportToolssuptools.msi”
Start -> programs -> Windows support tools -> command prompt
C:program filessupport tools>netdiag (now it will generate netdiag.exe)
C:program filessupport tools>dir /p (browse to see netdiag.exe)
C:> netdiag (It will generate netdiag.log file in C drive & perform series of network test)
NetSh Command (net shell)
Microsoft inspires from Cisco and makes command line net shell where all DOS commands are
Available
C:>netsh
Netsh> ? To see all command or contexts
Examples
Netsh>netsh dscp server dump to take dhcp backup
Netsh>netsh interface ip add address “lan” 1.1.1.1 255.0.0.0
To assign IP address to LAN card
Your purchase with Ciscoforall is safe and fast.
Your Learning Solution will be available for immediate download after your payment has been received.
 |  |